VNC connection to subdevices
The VNC connection provides remote desktop access to subdevices equipped with VNC
servers, directly through the UBIQUITY Manager platform, eliminating the
need for external tools or manual configuration.
You can connect to the subdevice VNC server through the VNC client integrated in the UBIQUITY Manager Tools.
Before establishing a connection, you will need two requirements:
- You have the Tools installed on your computer.
- Your device contains an UBIQUITY Manager Runtime with a PRO entitlement: This Runtime is going to be the access point of your connection.
Note:
To establish this
connection, your computer must be provided with a Pro entitlement.noVNC does not work with the RealVNC server.

- Register a subdevice to your domain.
- In Domain view, select the subdevice from your folders tree.
- On the Services panel on the right, click the circled plus icon next to Services.
- From the dropdown menu, select Add a service.
- In the Create service window:
- Enter a service Name.
- Open Service Type and select VNC.
- Specify a port.
- Select Save.
- Once you created a service, select it, then click Launch.
- Wait for the VPN to establish a connection with the remote subdevice.
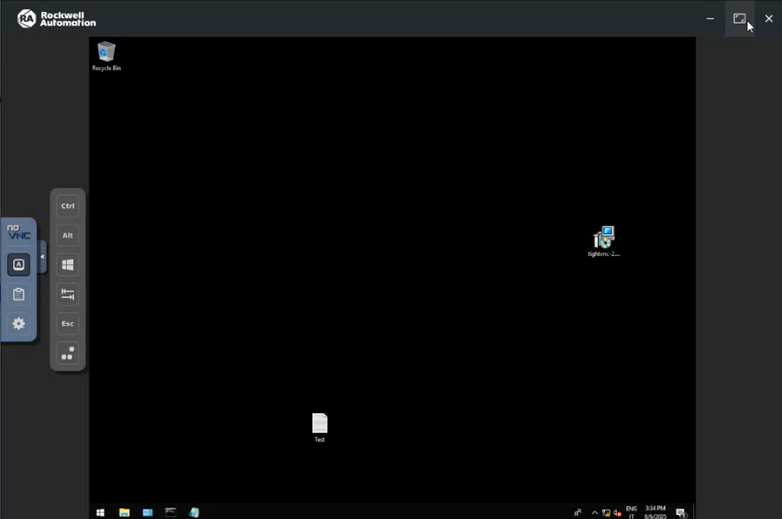
A windows opens showing the remote desktop of the subdevice. You can adjust its size.
Note:When connecting to UltraVNC, the mouse cursor does not display its standard shape but a simple dot.
On the left of the remote desktop window, you can find a widget that allows you to configure Settings. If you do not want to interact with the desktop, you can enable the toggle switch to View only.
The remote desktop window also features a Clipboard to copy text and you some buttons that simulate remote shortcut keys.